It's Larissa from 12 Days of christmas favor boxes Inspiration, here today to showcase a set of snowglobe gift boxes! I wanted to demonstrate two alternative ways that you can use snowglobes for your gift-giving packaging needs because they inspired me! You will definitely enjoy making them, but I'm sure the recipients will enjoy receiving these handmade gift boxes as much as the gifts inside!I began by using some light turquoise cardstock to die cut two Trinity Christmas Favor Boxes die cuts! Next, I used Salvaged Patina Distress Oxide Ink to ink the snowflakes using the Checkered Background Add-on Snowflakes Stencil onto the Die christmas favor boxes parts! For more texture, I then added some Picket Fence Distress Paint Splatters! Then, for extra sparkle and shine, I applied some Distress Mica Stain in Wonderland Splatters! SQUEAL! Although they are not required, these details really enhance the treat box's design!
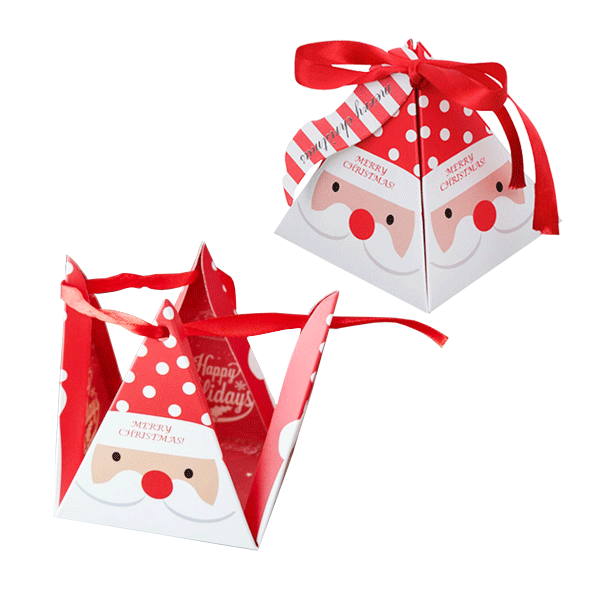
Here's A Closer Look At The Box's Details! How Gorgeous Is That?
I then made the tags that I wanted to attach to the christmas favor boxes Using the Snowglobe Tag Die Set, I began by making the snowglobe tag! SWOON! This set is adorable in every way, and I adore that it's not only for the holidays! It would be ideal for any winter birthday present demands, in my opinion! I made it into a Shaker Tag, but if you don't like Shaker Tags or don't have much time, it's still quite cute! I used Copic markers to color all of the images that I die-cut from white cardstock! I used Therm O Web Deco Foil in Radiant Red and Silver to Die Cut the Heart and the Snowglobe embellishments, then I attached everything to the Stenciled and Splattered Base! For the inside of the snowglobe, I used the exact same stenciled and splattered artwork as the gift box!
I added some Seafoam Iridescent
Pearl Confetti And Vanilla Sugar Snowflake Sprinkles!
After that, I used the Polar Bear Pair Die Set to create the gift tag on white cardstock and the same radiant red deco foil to create the scarf! I used Hickory Smoke Distress Oxide Ink on the Polar Bear and added some White Gel Pen Details! To make the Tag Loop, I also affixed a Bitty Tag from the Bitty Tags Die Set to the Polar Bear's back! Together with the sentiment tags that I stamped with the christmas favor boxes sentiment from the A Sentiment for (nearly) Everything Stamp Set, I also die-cut some heart tags from some radiant red deco foil using the Bitty Tags Die Set! Subsequently, I engraved and stamped the sentiments within the tags! The sentiment "Good Tidings" was stamped using the Good Tidings stamp set! The sentiment christmas favor boxes Blessings"
Was Taken Straight From The Same Stamp Set!
Next, I tied some twine around the Christmas Packaging Boxes and inserted the Snowglobe Shaker Tag along with the other Tags! Using Zots Glue Dots, I attached a Silk Ribbon and Twine bow to the tag/bag! I adore how this turned up, and I think it would be perfect for gift-giving over the holidays or during the winter! I started by assembling the gift box base for the snowglobe shaker gift box using the same steps and supplies as the first box, but this time I added some wood grain pattern paper to the bottom of the box to make it look like the snowglobe base! Next, I used the matching Shaker Box Add-on Die Set to Die Cut the Shaker Window out of the Gift Box! To ensure that everything matched, I made sure to use the same design when creating the Shaker Panel's interior!